
How to Attach a Roof Over a Deck From the House: Complete Guide
Before You Begin: Codes, Permits, And Scope
Adding a roof over a deck changes how your home handles weight, wind, and water. Confirm which residential code edition applies and when it became enforceable. Many places now use the 2021 edition with recent effective dates; that affects spans, connectors, and flashing. Next, verify permitting. Attached porch or patio covers generally need a building permit with plans that show framing, connections, and drainage; several jurisdictions state this plainly.
Safety And Feasibility Check
Inspect the existing deck. Posts, beams, footings, and the deck ledger must carry added dead load, possible snow load, and wind uplift. If you find shallow footings, undersized members, rot, or a questionable ledger, correct those before adding a roof. Large or high decks, heavy finishes, or long spans can push you beyond prescriptive limits.
Choose A Roof Style And Tie-in
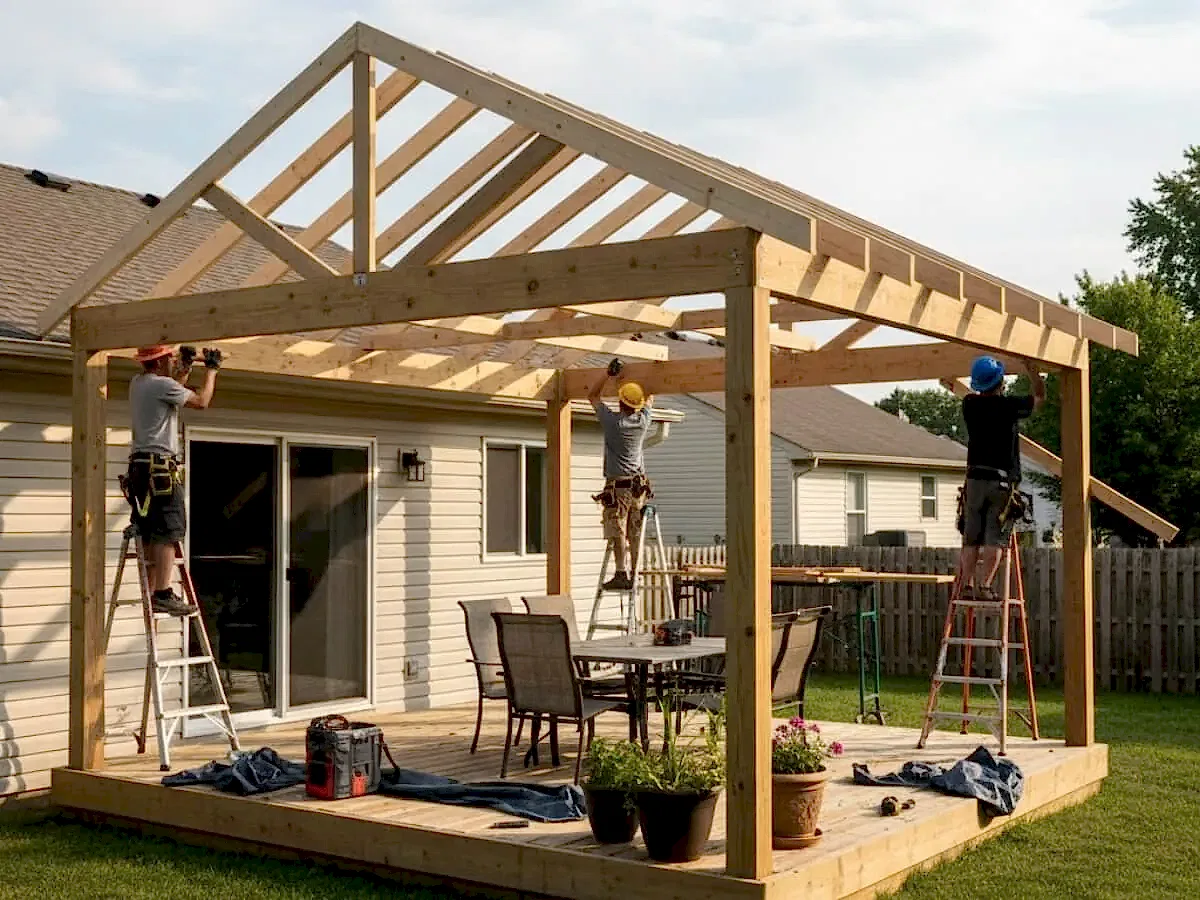
Most projects use a single-slope shed roof because it is simple and drains well. A gable can improve headroom at the outer edge. Select a slope that fits the roofing. Plan gutters so runoff leaves the deck. Where eaves are low, a wall-mounted ledger or plate is often cleaner than opening the main roof; when headroom is scarce, a small over-roof that tucks under shingles can work if the flashing is correct.
Tie To The Wall Or Over The Roof?
A wall connection fastens a ledger or plate to house framing, receives rafters in hangers, and is then fully flashed. This avoids disturbing the main roof. An over-roof laps above existing shingles and steps into sidewalls; it blends but needs careful underlayment, cricketing, and step flashing. Choose the detail that gives reliable drainage with the least cutting.
Verify Loads And Load Paths
Prescriptive resources in the region commonly use a 60-psf live load for decks; consult your local tables and amendments. The new roof adds vertical, lateral, and uplift forces. Provide a continuous path from rafters to posts to footings and back into the house. Where lateral connections at the deck ledger are required, install listed tension devices and follow spacing and capacity notes.
House Connection Basics
Fasten the ledger or wall plate to solid framing such as a band joist, studs, or engineered rim within its limits. Follow a fastening schedule that matches rafter spacing and tributary area, keep fasteners staggered, and respect minimum edge and end distances. The wall at this junction must be flashed; the ledger line is required to be protected by the exterior wall flashing methods.
Flashing and Water Management
Layer order that sheds water
Waterproofing is in layers. A reliable stack: back flashing or membrane at the wall, water-resistive barrier lapped correctly, structural ledger or plate, continuous metal flashing or drip cap above, and step flashings wherever a roof meets a wall. Extend underlayment upslope, use kick-outs at terminations, and integrate siding so laps always shed water. Gutters reduce splash and staining; they move runoff away from footings.
Materials and Hardware That Last
Fasteners and Connectors
Use preservative-treated posts and beams where exposure or concrete contact exists. Pair them with connectors and fasteners rated for treated lumber. Structural screws designed for ledgers and hangers. Use joist hangers, hurricane ties, post caps, and bases sized to your lumber. Stainless or hot-dipped galvanized hardware resists corrosion; mixing metals can cause staining and early failure.
Step-by-Step Installation Roadmap
1) Layout and Preparation
Protect siding and decking. Snap reference lines, confirm beam height with a laser, and dry-fit a few rafters to confirm slope and overhang. Verify that gutter outlets will clear stairs and walkways.
2) Posts and Beam
If footings are shallow or undermined, core new ones to the required depth and diameter. Set adjustable post bases, plumb posts, and install a sized beam. Use structural shims only. Confirm the beam aligns with the planned rafter seats.
3) House Ledger or Wall Plate
Open cladding to reach solid framing. Pre-drill where required and drive the specified structural fasteners to full embedment. Stagger rows, keep edge distances, and follow placement and spacing from the tables.
4) Rafters
Cut birdsmouths to sit fully on the beam or use the listed hangers. Keep spacing consistent, crown up, and block ends where needed. Add rafter ties or collar ties if required by span or uplift. Check straightness along the high line before sheathing.
5) Sheathing, Roofing, and Flashing
Nail sheathing per pattern, install underlayment and ice-barrier where required, then roofing. Integrate drip edges, step flashings, and head flashings in the right shingle-lap sequence. At the wall, reinstall cladding to overlap flashings; sealants are only a backup.
6) Use Predesigned Details Where Allowed
Some jurisdictions publish predesigned porch or patio cover details with limits on size, height, and spans so you can permit without engineering. Verify your project fits those limits before relying on them.
Inspections and Safety
Keep Inspections Easy
Expect inspections for footings, framing, and final. Keep post bases visible, have fastener schedules on hand, and leave flashing edges accessible. Use fall protection, tie off ladders, and cover holes daily.
Maintenance Plan
Clean gutters seasonally, wash organic growth from roofing and beams, and verify that fasteners remain tight. Recoat finishes every few years and replace worn sealant at penetrations.
Common Mistakes to Avoid
Skipping permits, fastening a ledger into weak materials, forgetting flashing, undersizing posts, and neglecting uplift ties are usual culprits. Plan lighting, a fan box, and wiring paths before you close the ceiling.
Why Work With Intercrus Decks
A roofed deck adds comfort across seasons, but success rides on a solid plan: clear code alignment, dependable connections, and smart water control. If you prefer an experienced team to handle design, permitting, and construction, Intercrus Decks can help. We build strong covers with correct load paths, tidy flashing lines, and smooth inspections, turning your open platform into a dry, inviting outdoor room that looks like it always belonged.