
Open Gable Porch Roof Framing: A Complete Guide for Homeowners
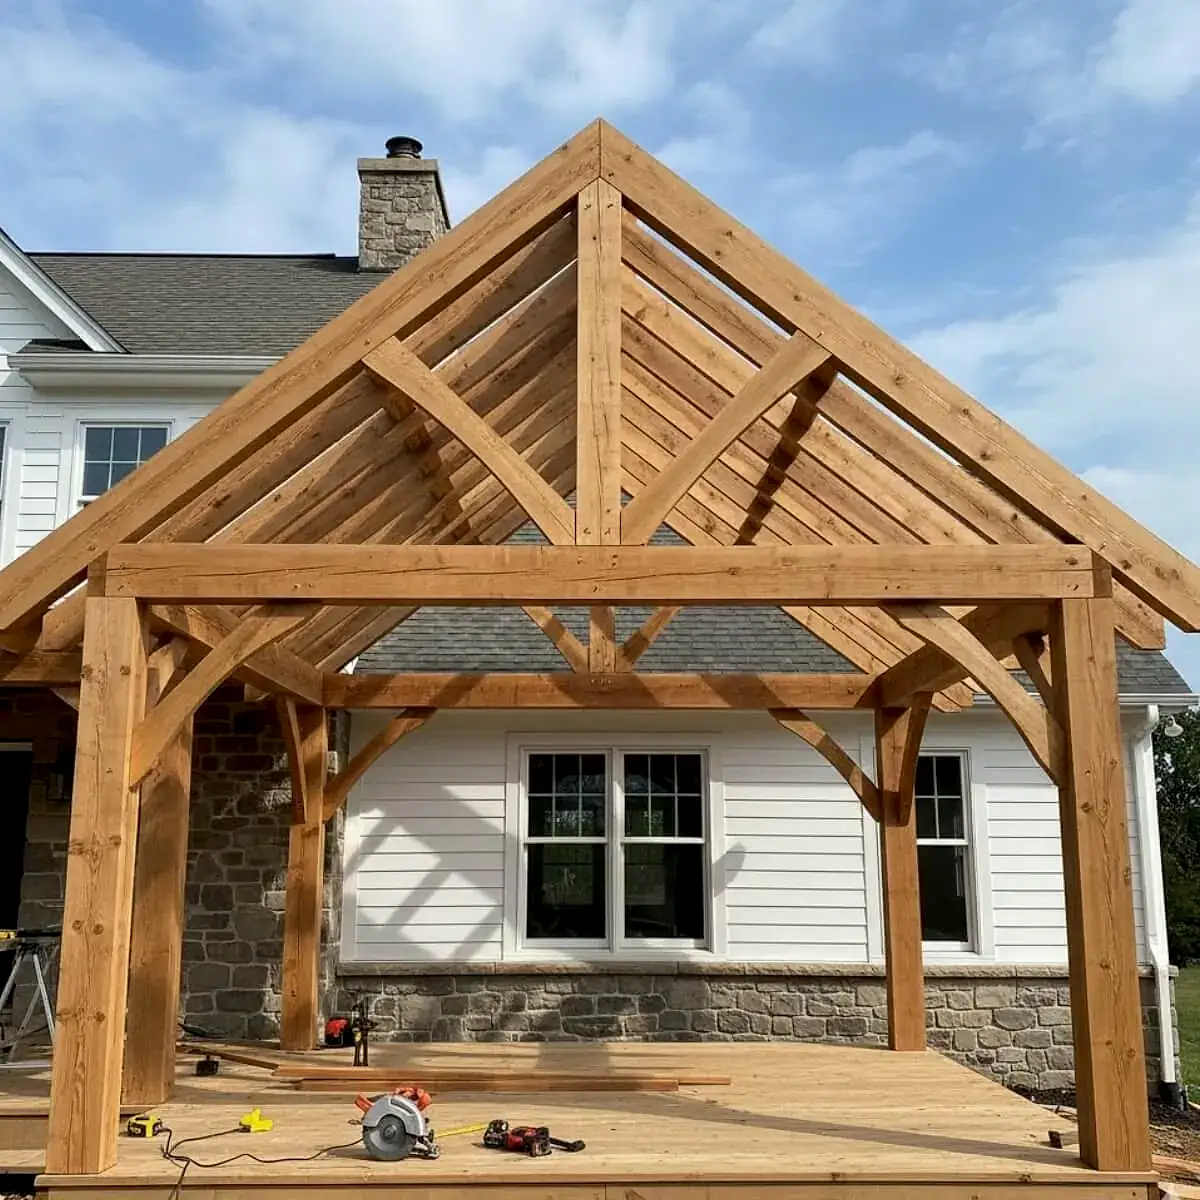
What Is an Open Gable Porch Roof?
An open gable porch roof has two sloping planes that meet at a peak, with a triangle-shaped gable visible at each end. Unlike a hip roof, the ends do not slope down. This shape creates strong lines, reliable water shedding, and generous headroom for a welcoming outdoor space. Framing focuses on a clear load path—from rafters to beams, posts, footings, and the soil—so every piece works together to support gravity, snow, wind, and seismic forces.
Anatomy at a Glance
- Ridge board or ridge beam: Runs along the peak; a ridge beam carries vertical load, while a ridge board aligns rafters that oppose each other.
- Common rafters: Sloped members from the ridge to the wall or beam.
- Rafter ties and collar ties: Ties resist spreading and add stiffness; placement depends on span and pitch.
- Gable-end framing: End walls or frames that support sheathing and outlookers.
- Beam/ledger: Front beam on posts; house ledger (when used) transfers load to the existing structure.
- Posts and footings: Transfer loads to the ground.
- Outlookers and barge rafters: Support the gable overhang and complete the roof edge.
Plan Before You Cut
Define Use and Loads
Decide how you’ll use the porch: for quiet seating, an outdoor kitchen, or a hot tub zone. More use often means more lighting, fans, and utility routing. If you live in a region with snow or high winds, plan for those loads early because they influence spans, connectors, and member sizes.
Check Local Requirements
Most areas require permits for attached roofs. Plan to submit a simple framing layout: spans, lumber species/grades, connection details, and tie-in to the house. When spans get long or conditions are unusual, consult a qualified professional for sizing.
Choose Pitch, Span, and Overhangs
Pitch drives appearance and performance. Steeper pitches shed water fast and make the gable more pronounced. Span (distance between supports) sets member size and connection strength. Overhangs protect the deck from rain and sun, but add leverage to rafters and outlookers.
Common Pitch Choices
Low to moderate pitches (e.g., 4:12 to 6:12) often strike a balance between headroom, material usage, and shingle compatibility. Higher pitches highlight the gable triangle and can expose handsome rafter profiles beneath.
Materials and Tools Checklist
- Structural lumber for posts, beams, rafters, ties, and blocking
- Structural panels for roof sheathing
- Corrosion-resistant fasteners and metal connectors
- Flashing for the ledger and any house tie-in
- Underlayment, drip edge, and roofing
- Layout tools: level, square, chalk line, framing square, and a reliable saw
Layout and Structural Basics
Footings and Posts
Footings must be below frost depth where required and sized for combined roof and wind loads. Use adjustable post bases where possible for moisture separation and fine alignment. Plumb posts carefully; tiny errors grow at the roof line.
Heavier roofs, long spans, and strong wind exposure demand larger posts and footings. When uncertain, verify sizes with a qualified pro and local code guidance.
Beams and Ledger
The front beam supports rafter tails or header joists. If the porch ties into a house, the ledger must be anchored to the structural framing—not just sheathing. Use proper fastener schedules and spacings, and include stand-off or flashing to manage water.
Install continuous flashing behind the siding and over the ledger, with a positive lap that sends water outward. Seal fastener penetrations, maintain drainage planes, and leave gaps where required for ventilation.
The Ridge and Rafter System
Decide whether you need a structural ridge beam or a non-structural ridge board with opposing rafters. Rafters transfer load to the beam/ledger, so seat cuts and bearing lengths must be accurate. Keep birdsmouth cuts within code limits.
Rafter Ties vs. Collar Ties
- Rafter ties (low in the span) resist outward thrust and keep walls from spreading.
- Collar ties (upper third) help resist uplift near the ridge.
Use the right tie in the appropriate location; sometimes both are used.
Gable-End Framing
Frame the triangular gable ends with studs and a strong top member. Add outriggers to support the gable overhang and connect them to solid blocking so loads transfer back into common rafters or a ladder frame.
Step-by-Step Framing Process
Snap Lines and Set the Ledger
Mark elevations and control lines on the house wall. Hold the ledger level, fasten per schedule, and install flashing. Re-check height to maintain the roof pitch you planned.
Install Posts and Front Beam
Lay out post locations, set bases, and plumb posts. Lift the beam into place, crown up, and fasten with approved connectors. Confirm beam straightness before proceeding.
Cut and Test the First Rafter
Use a framing square or stair gauges to mark the plumb cut at the ridge, the seat cut at the beam/ledger, and the tail for the overhang.
- Plumb cut at the ridge
- Level seat cut (birdsmouth) at bearing point
- Tail cut to length and fascia line
Set the Ridge Board or Ridge Beam
Brace the ridge assembly solidly at temporary heights. If using a ridge beam, make sure posts or hangers are ready to carry its load to the foundation or other structural support.
Install Common Rafters
Use the test rafter as a template. Toe-screw or use hangers as specified. Keep spacing consistent (commonly 16″ or 24″ on center), and verify a flat plane as you go.
Frame Gable Ends and Outlookers
Build the gable triangle, install the outriggers for the overhang, and tie them back properly to rafters or blocking. Add a barge rafter to define the gable edge.
Add Blocking, Ties, and Connectors
Install rafter ties where specified, plus solid blocking at the eaves to control airflow and resist roll. Use approved connectors at critical joints such as rafter-to-beam and rafter-to-ridge, especially in high-wind areas.
Sheathing, Underlayment, and Drip Edge
Sheath perpendicular to rafters with staggered joints. Nail per panel schedule. Then lay the underlayment from eave to ridge with adequate overlaps. Install drip edge at eaves first, then rakes.
Flash the House Tie-In
At the ridge and any wall intersections, step and counter-flash to keep water out of the building envelope. Ensure the underlayment laps under the step flashing but over the lower courses to shingle the water correctly.
Venting and Finishing Details
If the roof will be insulated, plan ventilation: intake at the eaves and exhaust at the ridge or gable. Add fascia, soffit, and frieze boards. Pre-prime or treat cut ends. Prepare for roofing, gutters, lighting, and ceiling finishes.
Weatherproofing and Longevity
Moisture Control
Water is your roof’s biggest enemy. Maintain continuous flashing, proper laps, and clear drainage paths. Keep wood off concrete where possible and use stand-offs and caps that shed water.
Uplift and Lateral Resistance
High winds try to lift and rack a porch roof. Tie rafters to beams with approved connectors, anchor posts to bases, and use diagonal bracing or sheathing to resist racking. Good nailing matters as much as member size.
Fasteners and Corrosion
Use fasteners compatible with treated lumber and your climate. Coastal or wet locations often need enhanced corrosion resistance. Avoid mixing metals that can react.
Design Touches That Elevate the Look
Exposed Structure and Ceilings
Exposed rafters or a simple vaulted ceiling can give the porch character. Consider beadboard or clean paneling beneath the rafters. Keep electrical runs tidy and accessible.
Lighting, Fans, and Gutters
Plan boxes and blocking for fixtures before sheathing. Fans improve comfort in warm weather; gutters direct runoff away from posts and deck boards, reducing splash and the risk of rot.
Common Mistakes to Avoid
- Skipping permits or structural checks
- Undersized footings and beams
- Poor ledger fastening or missing flashing
- Incorrect birdsmouth cuts that weaken rafters
- No rafter ties were needed
- Sparse nailing and missing connectors
- Ignoring ventilation when adding insulation later
Safety and When to Call a Pro
Roof framing involves heights, heavy members, and exposure to the weather. If you’re unsure about spans, connectors, or tie-ins to the house, get guidance from a qualified professional. Good framing is both a safety and longevity investment.
Build It Right With Intercrus Decks
An open gable porch roof can transform your outdoor living area with clear lines, solid shade, and reliable protection. The steps above cover planning, layout, structural basics, and weatherproofing so you can understand how everything fits together. If you want a porch roof that looks great and performs season after season, Intercrus Decks can design, frame, and finish it with careful attention to structure, water management, and clean detailing. Reach out to our deck contractors for a porch roof that’s built right for your home and lifestyle.
FAQs About Open Gable Porch Roof Framing
How do I choose between a ridge board and a ridge beam?
A ridge board aligns opposing rafters; a ridge beam carries vertical load at the peak. Long spans, vaulted ceilings without low rafter ties, or heavy roof finishes often push you toward a ridge beam.
Do I need rafter ties if I like an open ceiling?
Often yes. Without proper ties, rafters can push outward and cause walls to spread. If you want more headroom, ask about raised rafter ties or a structural ridge beam to control thrust.
What pitch is best for an open gable porch?
Moderate pitches around 4:12 to 6:12 suit many homes, balancing headroom, water shedding, and material use. Steeper pitches create a bold gable triangle and shed rain very quickly.
Can I attach a porch roof to the house without a ledger?
You can use a freestanding design with posts and beams near the house, avoiding a ledger entirely. This approach can simplify waterproofing, though it may require additional posts and deeper footings.
How far can rafters span?
Span depends on species, grade, size, spacing, loads, and pitch. Use local span guidance or consult a qualified professional for exact sizing.
What’s the most important waterproofing detail?
Ledger flashing is critical. Flashing must lap correctly with the house’s weather barrier so water is directed outward, not behind the ledger or into the wall.